Follow these steps to ensure accurate and timely results when collecting and submitting your drinking water samples to the lab:
- Obtain a drinking water test kit from the lab. ARA is located at 124 Heritage Avenue in Portsmouth, NH and kits are available for pickup M-F 9a to 5p.
- Before you begin, ensure that you are able to get the samples to the lab the same day you collect them (this cannot be a Friday, Saturday, Sunday, or day before a Holiday).
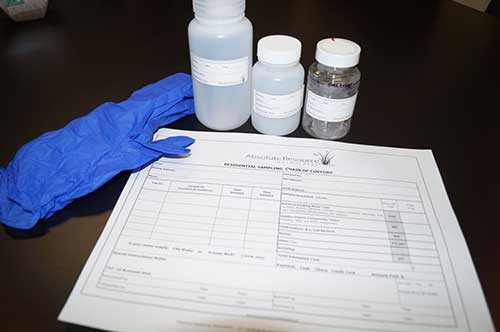
- Inspect your kit, which should include bottles/sample containers, safety information, gloves, chain of custody form, and instructions.
Instructions for ARA’s Standard Testing Kit
(Note: instructions vary for our other testing kits, so be sure you have the correct containers and follow instructions carefully)
Bottle 1 is labeled Metals:
This bottle is used to test for Metals including Lead, Iron, Arsenic, Copper, Manganese, Sodium and also Hardness.
Bottle 2 is labeled Anions:
This bottle is used to test for Chloride, Fluoride, Nitrate, Nitrite and pH.
Bottle 3 is labeled Bacteria:
This bottle is used to test for Bacteria only.
Note: VOC analysis is not included in the Standard Water Quality package. If you would like to test for VOCs, contact the lab for VOC-specific bottles and sampling procedure.
Sampling Instructions:
• Samples must be returned to the lab on the day they are collected. They can be dropped off Monday -Thursday.
• The sample should be taken from the most frequently used tap (usually the kitchen sink).
• Remove the screen/aerator from your faucet.
• Using a 50:50 bleach and water solution on a cloth or paper towel, wipe down the faucet head.
• Run your cold water for no less than 5 minutes.
• Once water temperature has stabilized, reduce the flow to 1/8 inch.
• Put on the gloves included in your sampling kit.
• Being very careful not to let them overflow, fill bottles 1 and 2 to the neck, and replace caps securely.
• Bottle 3 (bacteria) has a white powder preservative inside of it (sodium thiosulfate). Please do not wash it out or touch it.
• Once you remove the lid on this bottle, collect the sample right away.
• To avoid introducing contaminants to your sample, do not touch inside the bottle, the opening of the bottle, or inside of the lid.
• Fill the bottle up to just above the 100mL line and replace the cap securely.
• Place the samples into the zip lock bag and add ice. Bottles must be received on ice.
• Fill in the information on your Chain of Custody (CoC) form, completely and accurately.
• Return the samples to our facility Monday through Thursday, between 9am and 4pm.
• We cannot accept samples on Fridays, and before certain holidays. Call the office at 603-436-2001 FMI.
• Laboratory address for dropping samples is 124 Heritage Avenue, #16, Portsmouth, NH.
Click photo to view 3 minute video showing how to collect your drinking water samples.
Sampling Notes per Analyte:
Stagnant Lead & Copper: Sample your water in the morning before it’s been used for the day, with the screen/aerator on. Water should sit in the lines for 6-8hrs prior to sampling. Turn on the cold water and immediately fill the bottle to the shoulder. Cap the bottle securely.
PFAS: Collect this sample first (but after stagnant Lead & Copper). Turn the cold water faucet on and allow the water to run for 4-5 minutes or until the temperature stabilizes. Remove the caps, place face-up on the counter and fill each bottle to the shoulder. Cap bottles securely and place in a separate ziplock bag. *USE ONLY REAL ICE (NO Ice Packs/Blue Ice/Gel Refrigerants)*
Bacteria: Remove the aerator/screen from the end of your faucet. Use a solution of 1/2 bleach and 1/2 water on a clean cloth or paper towel and wipe down the faucet head. Rinse off bleach. Turn the cold water faucet on and allow the water to run for 4-5 minutes, or until the temperature stabilizes. Remove the cap, place it face-up on a clean counter surface and fill the bottle to the 100mL line. Cap the bottle. Note: this bottle contains a powder preservative- do not wash it out. Do not touch the inside of the cap or bottle.
Metals: Remove the cap, place face-up on the counter and fill bottle to the shoulder. This can be done in conjunction with the running water utilized for the Bacteria sample. Cap the bottle securely.
pH/Anions bottles: Remove the cap, place face-up on the counter and fill bottle to the shoulder. This can be done in conjunction with the running water utilized for the Bacteria sample. Cap the bottle securely.
Radon: Remove aerator and screen from faucet. Run cold tap for 4-5 minutes, until temperature has stabilized. Reduce flow to 1/8 inch diameter. Remove bottle cap and place face up on a clean surface. Fill vials until water rises just above the rim, and then carefully screw on cap. There should be NO air left in the vial. If you find an air bubble, carefully unscrew cap, add more water, and recap.
VOC: Remove aerator and screen from faucet. Run cold tap for 4-5 minutes, until temperature has stabilized. Reduce flow to 1/8 inch diameter. CAUTION: Vials contain acid- wear gloves and glasses for safety. Remove bottle cap and place face up on a clean surface. Fill vials until water rises just above the rim, and then carefully screw on cap. It is normal for acidic water to run down the sides- USE CAUTION. There should be NO air left in the vial. If you find an air bubble, carefully unscrew cap, add more water, and recap.